When the temperature inevitably drops one wintry day it helps to have some options. We normally try to get outside as much as possible, but there are times when it’s just too cold to be safe. Enter: Snow Experiments! These 3 snow experiments are quick and rewarding, with maximum awesomeness for minimal outside time. Each of these can be done in about 10 minutes, getting everyone out into daylight for a few minutes then back inside before it’s too much. I also made a brief note about why it works for when kids are asking for the hows and whys. I’m certainly not a scientist, but it’s enough of a cursory understanding to work some science in to your play. Have fun!
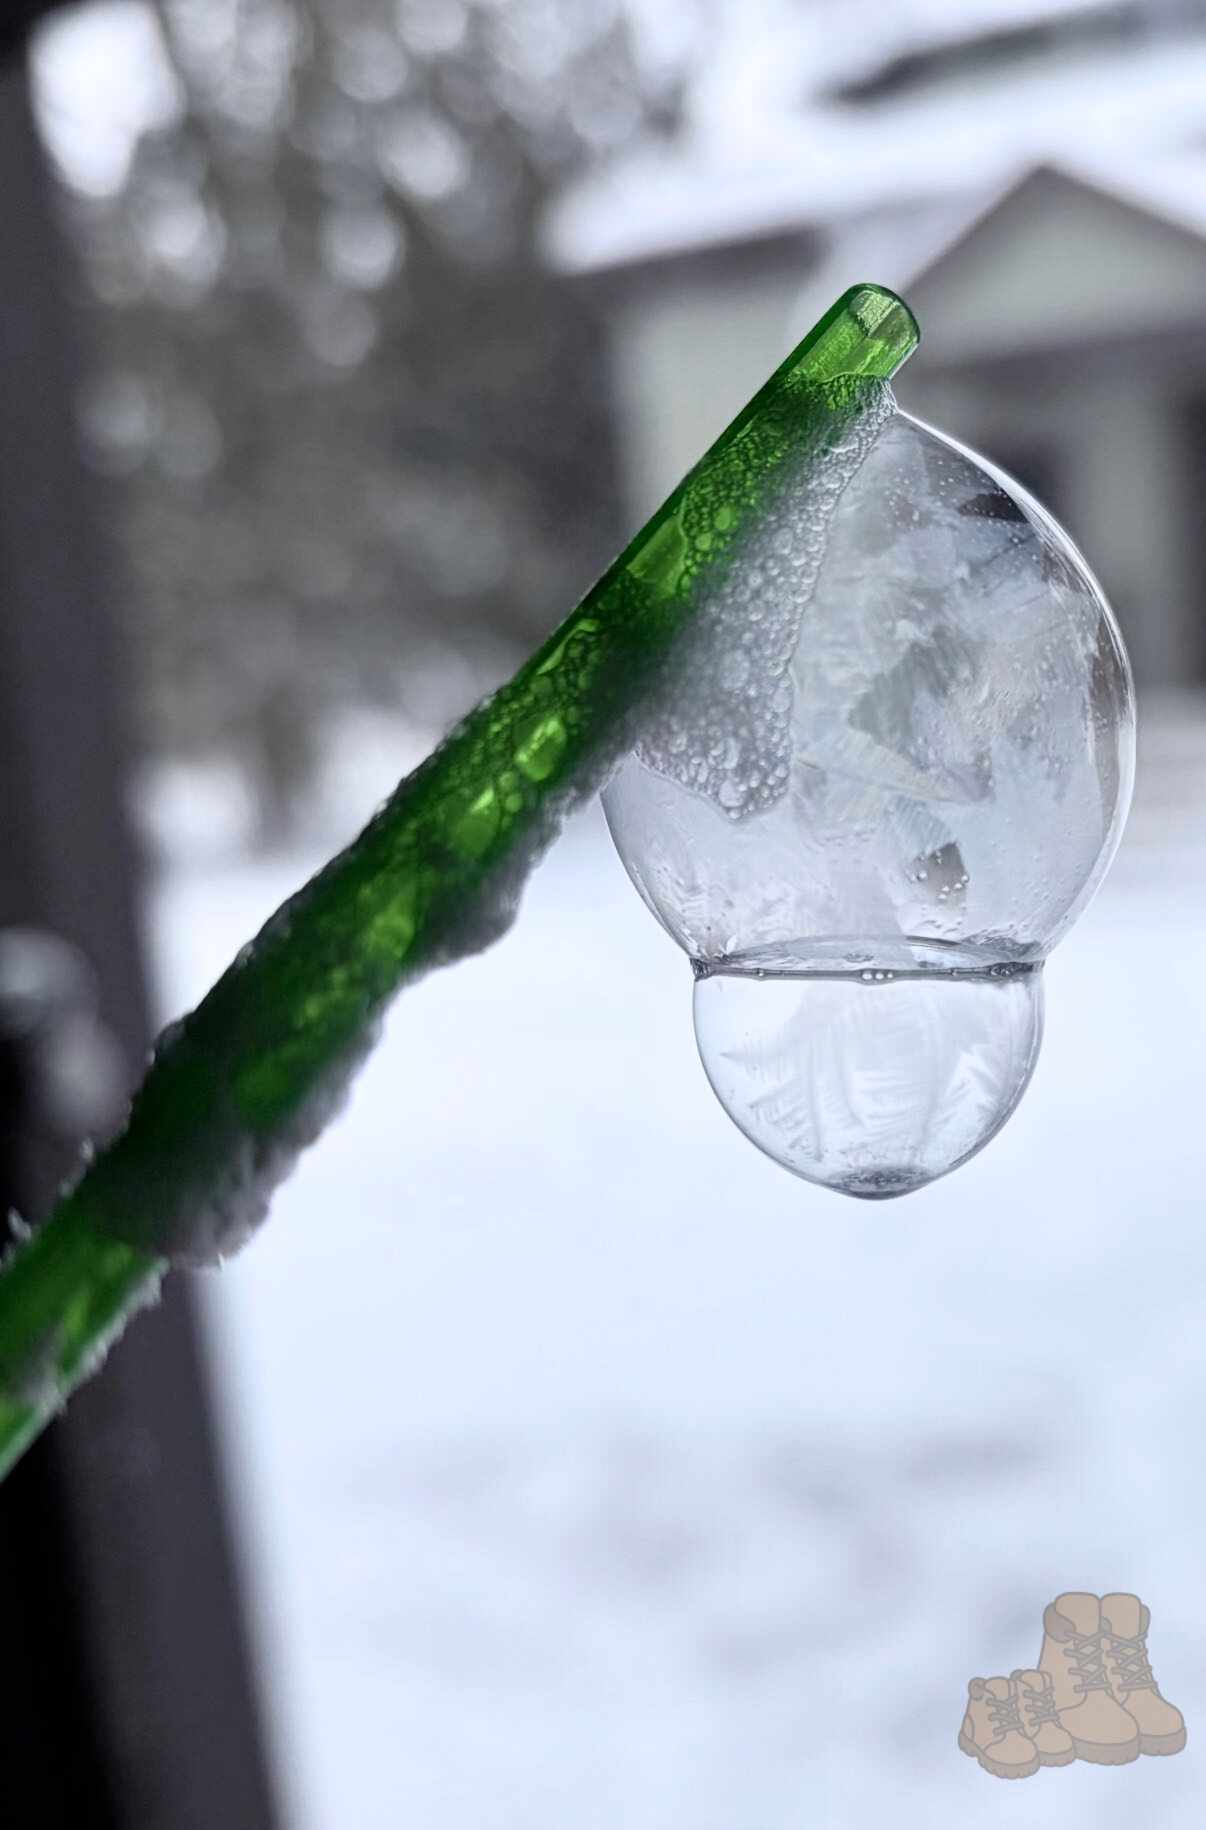
Ice Bubbles
You’ll find these all over the internet for good reason–they’re hecking pretty. Make the solution up inside, then use a straw or bubble wand outside to form the bubbles. The solution tends to work a bit better if you let it chill a bit before using, and make sure it’s well below freezing outside for optimal ice magic. One of the few things that gets better the colder it is! I’d suggest shooting for 15°F (-9°C) or less.
For technique we highly recommend using straws, dipping the straw in the bubble solution, then slowly exhaling to form the bubble and set it on some snow.

Materials
- 1 cup of water
- 2 tablespoons corn syrup
- 3 tablespoons dish soap
- 1/2 tablespoon corn starch (optional, but makes the bubbles a bit sturdier)
Why it Works
This experiment is all about crystallization. Bubbles in general are made of a thin layer of water trapped between 2 layers of soap. These special edition bubbles have the corn syrup to make the soap layers thicker and sturdier, allowing them to hold up to the weather while the water layer freezes in to ice crystals before the bubble pops.
Snow Ice Cream
Seasonal treats are that much more special for being time limited! A tasty sweet snack that you can make with fresh snow, snow ice cream is a hit for everyone. On those super cold days we’ll make it outside, then retreat back in for the snacking.
Good news is this comes together very quickly, and doesn’t require much mixing time at all. It does work a bit better if you use a metal mixing bowl and sprinkle some salt on the snow directly under the bowl (see science notes below for why).

Materials
- 1.5 cups heavy cream
- 1/3 cup powdered sugar
- 1 tablespoon vanilla extract
Whisk the ingredients together inside in the metal bowl. Bring outside, sprinkle your salt, and set your bowl down. Add fresh, clean snow from an untouched area to the mixture until it’s about the consistency of a Flurry/loose milkshake. For us that’s about 4 cups but will vary with snow density. Add sprinkles on top if you’re feeling festive!
Why it Works
When doing this experiment we can talk about why we bother with the salt and metal bowl. The answer is conduction, as metal conducts heat (or cold, in this case) as opposed to plastic, which would insulate. Our sprinkle of salt lowers the freezing point of water, turning the snow back to water that is actually colder than the snow was. Then when you put a metal bowl on top of that, the metal efficiently conducts the cold and keeps the snow from melting while mixing. This way you can mix it up without it turning in to snow slop!
Snow Volcano
The classic vinegar volcano is just as fun in the snow, and has the decided advantage of not needing to clean it all up when you’re done! If the weather is a bit warmer you could totally set up a whole scene if you wanted, or you can build a volcano and call it a day.

Materials
- a tall cup or bottle
- 3 tablespoons of baking soda
- a squirt of dish soap (for extra bubbles)
- a few drops of red or orange food coloring for lava
- vinegar
Mix everything except the vinegar in your cup. Take it outside and have the kids build a volcano/mountain shaped structure out of snow. Place the cup inside the peak of the volcano, making sure the opening is still visible. Have a little countdown and add vinegar to the top until it starts fizzing! It won’t take much.
Why it Works
This is a super standard example of an acid/base chemical reaction. The vinegar is an acid, and when it comes in contact with the baking soda (a base) it reacts to create a gas called carbon dioxide. That gas is what is creating all of the fizzing action, and the dish soap helps trap the gas to make it more bubbly. Doing this in cold weather creates a bit of a quick-freeze effect, so you get more of a lava flow effect.
And there we have it! Have you ever tried some snow science? What was a hit in your family?
Happy experimenting! 🥾💚